VIDEO: BMW teaches us how to correctly mount snow chains


Even though winter is almost gone in the Northern Hemisphere, it’s never too late or too early to learn how to install snow chains on your BMW car.
Snow chains can decisively improve the traction of your vehicle and road adhesion in certain conditions. They are effective on moderately snow-covered tarmac, when the surface consists of an inferior layer of basically ice followed by an upper layer of fresh snow / snow-ice mixture / snow-ice-water mixture.

Moreso, snow chains should be used for a limited amount of time, only when traveling on such surfaces. They are efficient mainly in the mountainous regions, where inclined roads predominate, by ensuring extra grip. If the snow cover on the road is heavy or if the tarmac is wet, but clean, they prove to be ineffective and could potentially damage your car by affecting crucial wheel components.
To sum up, snow chains must only be used when the situation really demands this type of equipment. As well, they must always be mounted only on the main drive axle of the car or the drive axle that receives the highest amount of torque from the engine.
The latter situation is addressed specifically to BMW models equipped with xDrive. For such vehicles, in normal torque distribution, the snow chains must be fit to the rear wheels.

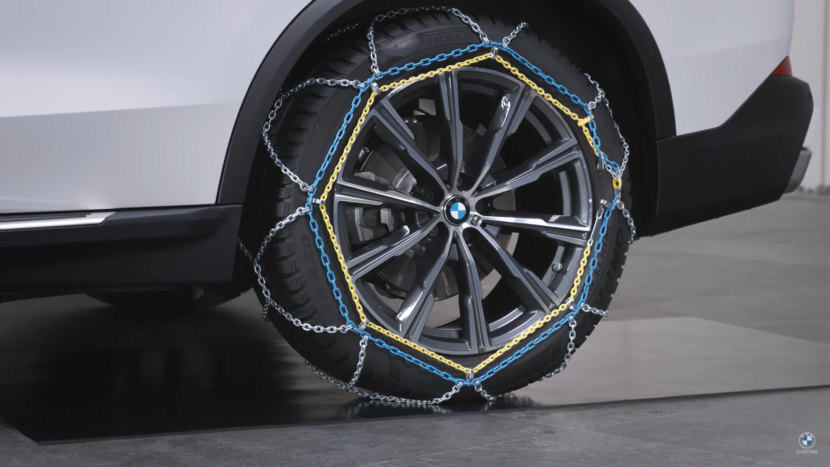
As part of the Original Accessories program, BMW also offers the Snow Chains Comfort, available for the majority of models in the portfolio. The newest How-To video explains the necessary steps behind the correct installation of snow chains on BMW models.
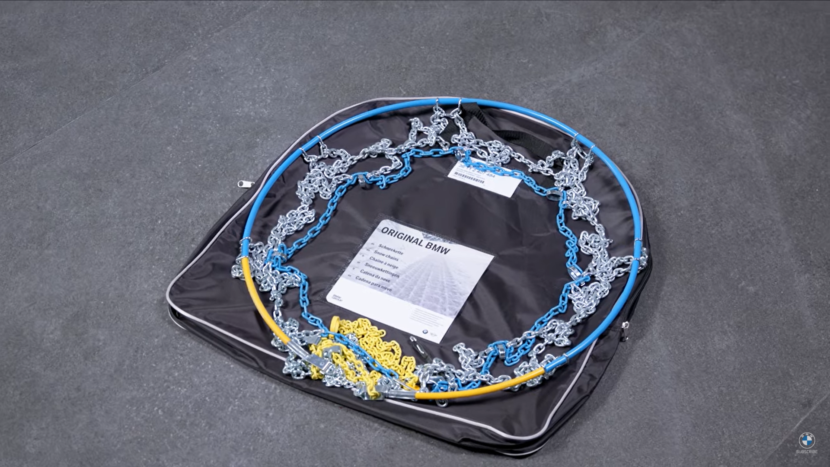
Step 1. To begin the procedure, take the snow chain from the box, expand it with the two hands and make sure no parts are tangled. You must hold the blue rubber ring towards the inner part of the wheels. In this position, proceed with passing the ring over the top of the wheel to place it on the inner part through the wheel arch.

Step 2. Then, move the car forward or backward about 1/4 of wheel, as to make sure the tensioning chain is not placed beneath the wheel. Grab the yellow part of tensioning chain and pull it all the way through the locking plate, tightening it and locking it in the opening of the plate. Then pull the yellow tensioning chain upwards passing in sequence through all the metallic rings/eyes.
Step 3. After you have successfully passed the tensioning chain through all pull-through eyes, unwind the clamping hook of the yellow chain and anchor it on the blue outer chain. After driving for approximately 200 – 300 meters, stop the car and check the tensioning of the snow chain.
These are our Top Three Winter Tires for your BMW for 2020
Only if needed, make sure to carefully re-hook the yellow tensioning cable again more tightly on the outer blue chain, without applying excessive force that could damage the entire snow chain by causing a rupture (subsequently damaging the wheel and wheel components).

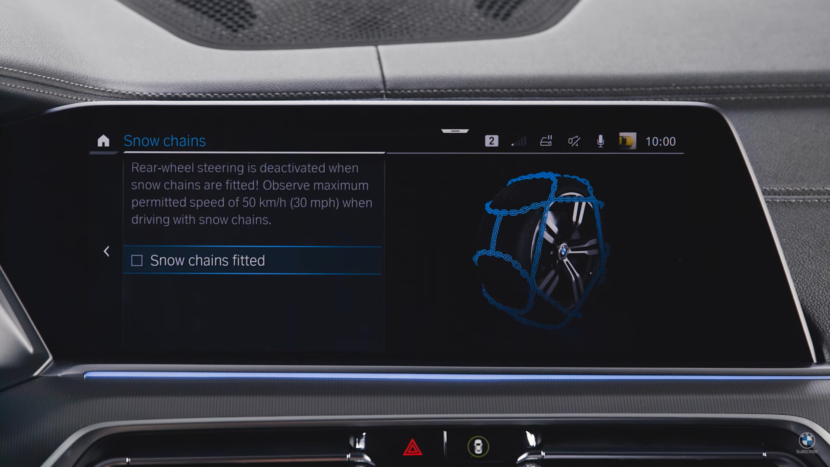
Step 4. Last, but not least important, when driving with mounted snow chains, make sure to tick the option “Snow chains fitted” from the OS 7.0 infotainment menu. Therefore, when the vehicle equipment is applicable, the Integral Active Steering which veers the rear-axle wheels will be deactivated as to prevent physical damage to crucial components.
Also, don’t forget that the maximum speed when driving with snow chains is 50 km/h (30 mph).
Now let’s see the exact procedure in the latest BMW How-To video below. Drive safe!
The article VIDEO: BMW teaches us how to correctly mount snow chains appeared first on BMW BLOG
